Creating a real-time test automation platform for Cisco with React &
WebSockets…and React Native

Amongst other things, highlights include:
- Building a command line interface in the browser for test engineers to remotely debug scripts they’re running
- Fine-tuning the performance of the UI to handle hundreds of messages a second over the WebSocket connection, whilst keeping the interface responsive
- Porting a section of the web application to an iOS app using React Native
Purpose of the application
I was brought onto the project in May 2015 to build a web application from a set of pre-existing wireframes. I was given complete freedom to pick a tech stack/libraries to use on the front-end as long as:
- I could justify their use and my choice in them
- My choices in them contributed to what the application needed to do
I was going to be building a client-side application that would connect over a single WebSocket connection to a Python backend. The application (including the Python backend) would be deployed onto machines in over 6000 plants and manufacturing factories around the world, including companies like Foxconn; the manufacturing company that builds electronic devices for a range of companies including Apple, Samsung and Microsoft.
The application was to be used by test engineers to remotely debug scripts they’d written to test physical devices, and by operators who would be using the application to monitor the actual test results and to initiate/abort/pause the tests themselves. The test engineers could place questions in their script, which would pop up in the application for the operators to interact with, making the test execution dynamic, which the user interface would respond and update accordingly to. More features of the application are explained below.
Client-side tech stack
Having already built large scale client-side applications for companies like KashFlow and Kayako, I was already experienced in architecting this kind of setup, but this Cisco application needed the added fun of being real-time. So performance was going to be of paramount importance, as I said, there was going to be tests constantly running and updating the user interface, but it also needed to respond immediately to operator/test engineer intervention.
With KashFlow and Kayako, I’d used Backbone.js to create both applications. However, with the importance of performance, I looked towards React to handle both the rendering of the user interface and responding to the user interaction.
Here’s the email I sent on the 6th May 2015, justifying and explaining the main components in the stack:
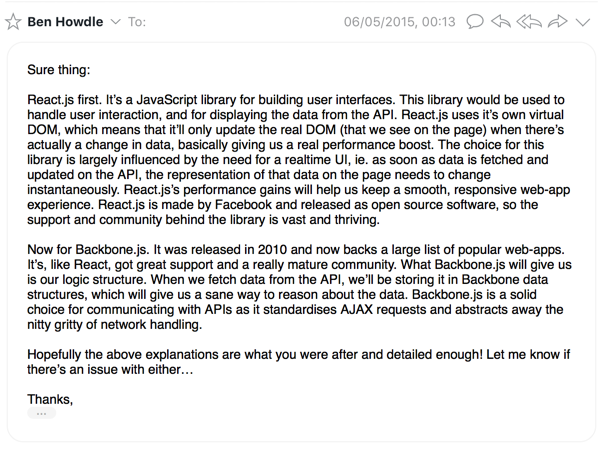
I’d say most of that still holds up.
WebSocket
The actual WebSocket connection is set as the property connection in an ES2015
JavaScript class, the class being exported as a singleton. The WebSocket class
is largely spec compliant, with the only
library being used to
provide the ability to automatically try reconnects when/if the connection
drops. The messages sent to and from the backend are encoded and decoded into
JSON format, with an example response looking like this:
{ "action": "update", "container": "Foo|Bar|Baz", "update": "status", "value": "RUNNING" }
This tells me on the client-side that a test has started and a container is now running this test.
I would then transmit an event to the rest of the application, informing them that there was new data from the backend.
This event action would look like this (for the update above):
Dispatcher.emit('api:data:update', { "action": "update", "container": "Foo|Bar|Baz", "update": "status", "value": "RUNNING" })
More on the Dispatcher object below.
Sending messages to the backend follow the same structure, but the object gets
ran through JSON.stringify and sent as a string.
Event Emitter
I decided that communication throughout the application would largely take places through a central event emitter. For this, I used this excellent library. New data from the backend is broadcast through the Dispatcher (the exported singleton of the Event Emitter library) and whoever is interested in this specific information will listen out for it.
Backbone
Backbone is used as the data layer in the application. It’s job is to listen to
events from the WebSocket class (through the Dispatcher), parse and store that
data. After the Collections and Models have stored this data, they themselves
emit an event informing the React Components of this new data.
React
Once the React Components are informed there is new data available in the
Backbone layer, it calls methods on the Collections/Models to fetch this data,
ie. this.props.containersCollection.getContainers() which returns an array of
objects, which we can just store in the Component State object and trigger a
re-render of the Component.
Performance
Identifying, analysing, debugging and improving performance in this application was the cause of many a headache and long days of trial and error and staring at Chrome DevTools timeline results and profile outputs.
There were two main areas in the application which required a lot of attention, one being a view of several, even hundreds, of “containers” (a container will run a sequence of tests) that could be started simultaneously. By running them all at once would cause the backend to be sending multiple updates for each “container” at once, each requiring a visual change in the display of the interface.
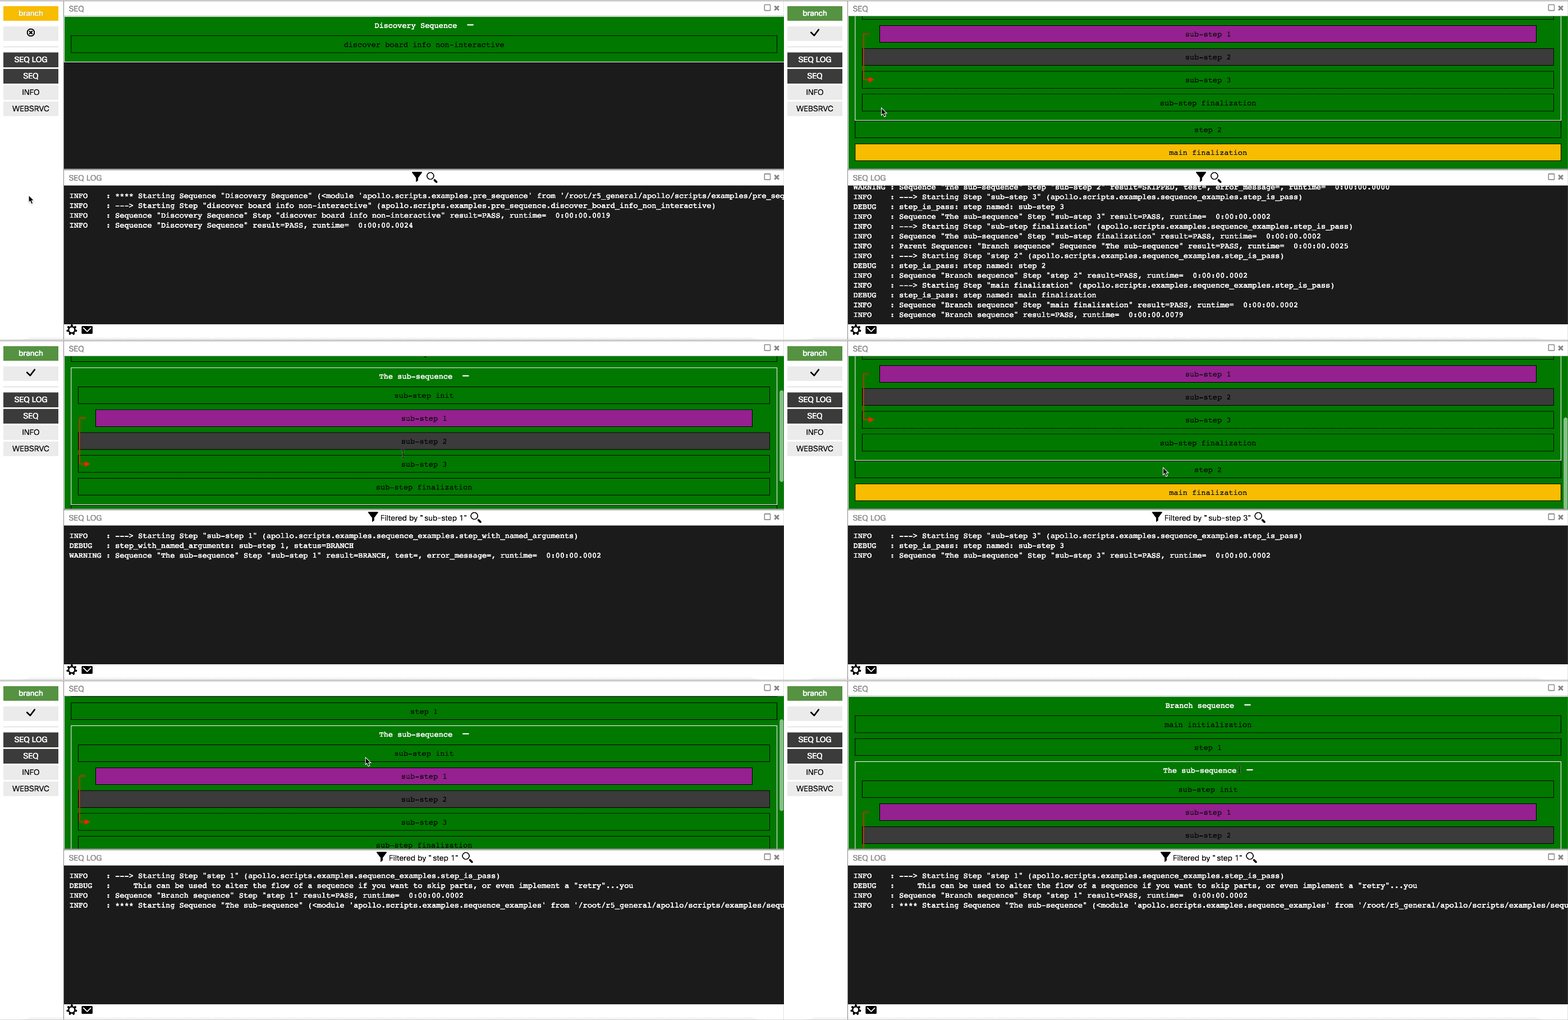
Starting 50 “containers” simultaneously. Updates would roll in from the backend multiple times a second.
The second area being a Debug screen. This screen allowed test engineers to remotely debug their scripts that were running in these containers. The interface allowed them to drag ‘n drop several “console windows” onto an area of the screen which, when dropped, would open up a connection to the container through the backend. Some console windows were for logging, so would merely display data coming from the backend, some were more visual and would display a visual representation of the sequence of tests that were running, along with SVG arrows to indicate the flow of execution of each test.
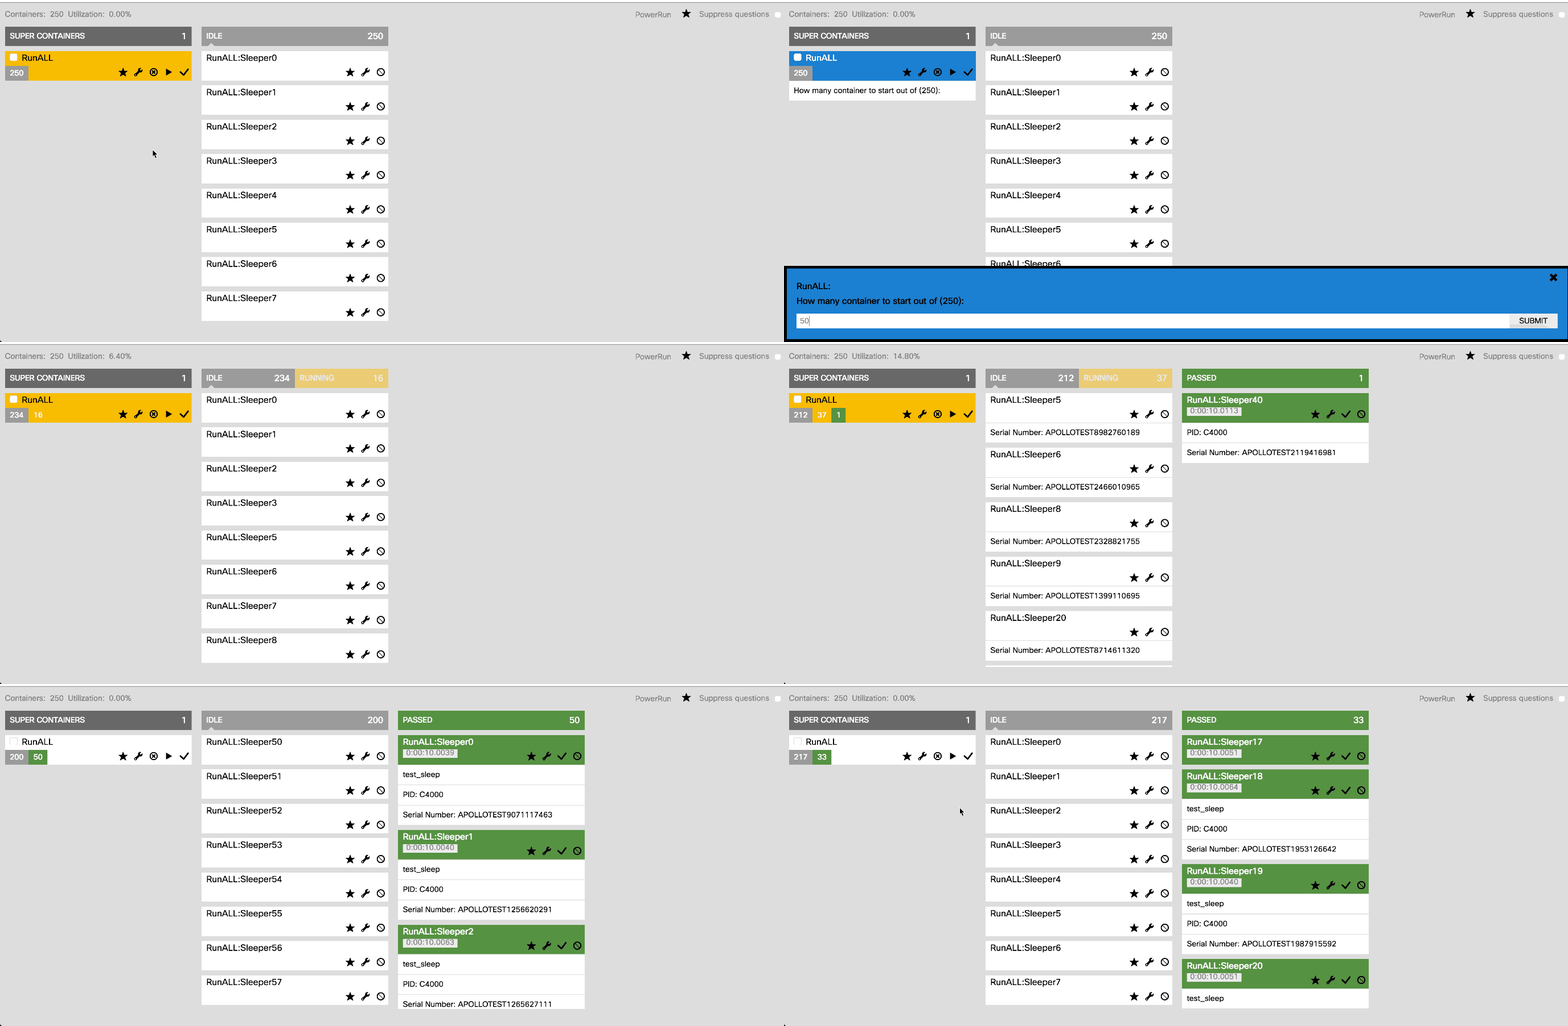
Utilising SVG to draw arrows between the different test steps in a sequence
The most complex console window type allowed the engineer to interact with the container over an SSH connection (through the backend) which needed to be completely emulated in the browser.
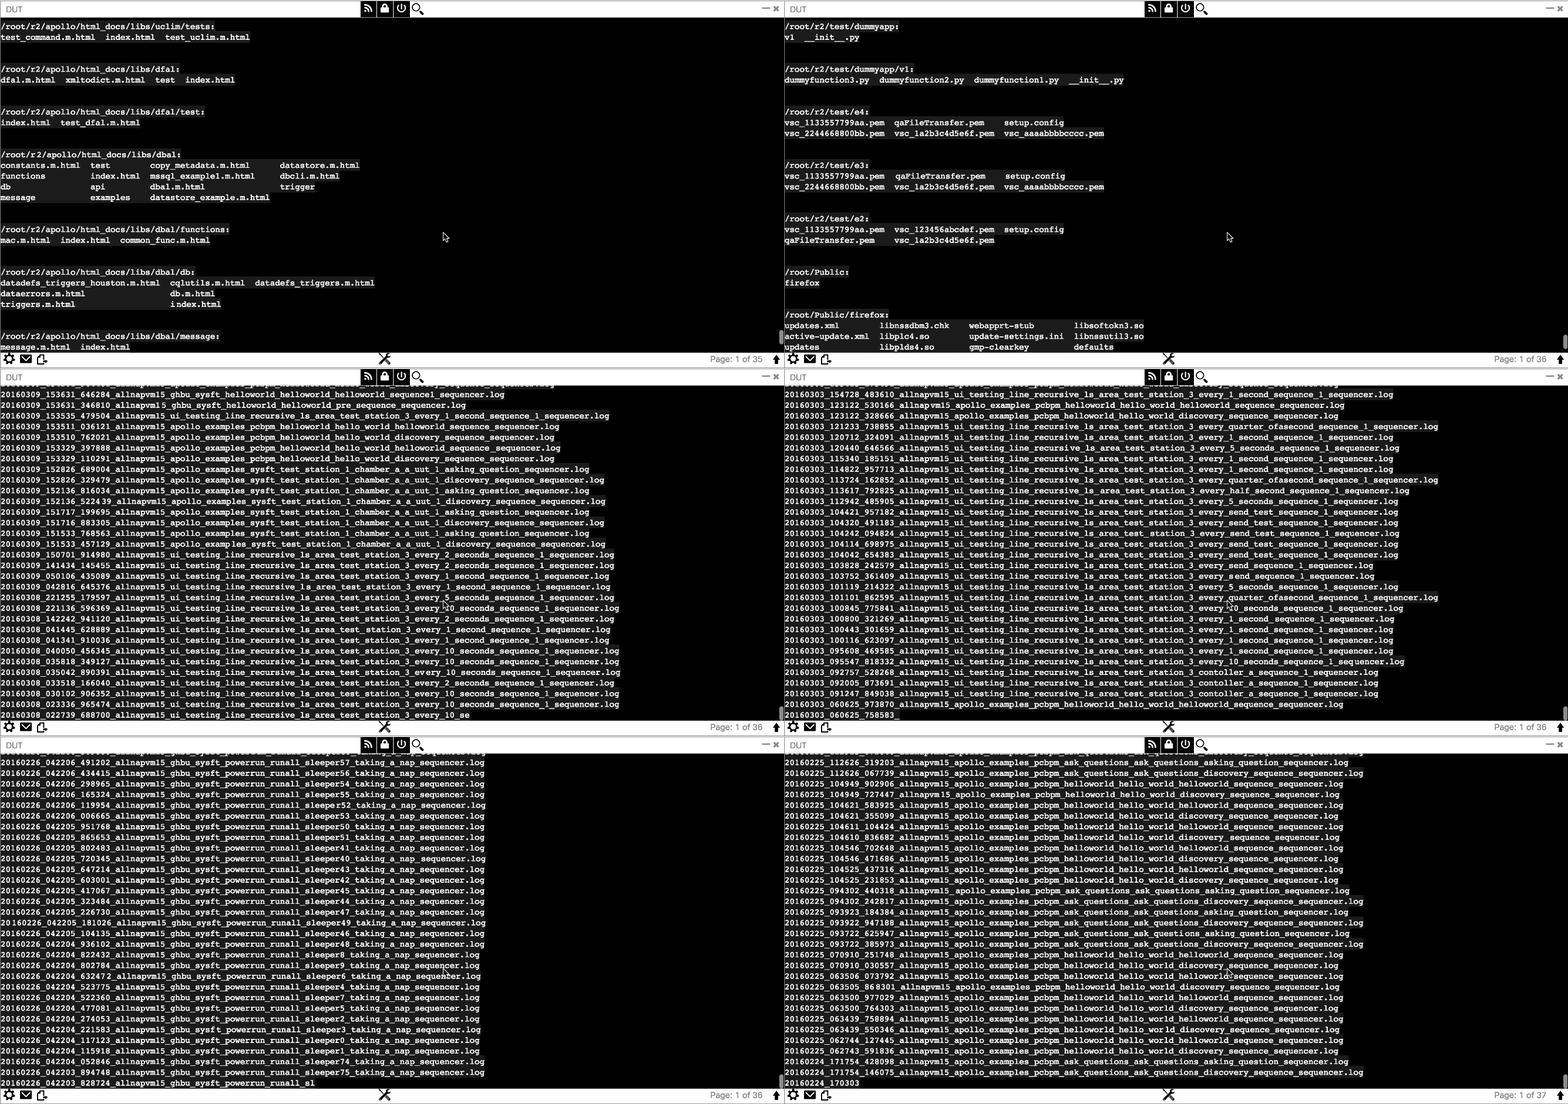
Lots and lots and lots of data. This console was fully interactive, with keyboard shortcuts and paging
Yep, this meant re-writing a large proportion of an actual terminal, but in the browser…
Fun. times.
Each keystroke typed by the engineer would be sent to the backend, processed,
and a response sent back to display on screen in the console window. ie. If I
typed “l” then “s” then hit enter, the backend would send back the output of
running ls on the command line. This terminal emulator involved lots of
formatting (for sent vs. received characters), showing/hiding of special
characters (ie. \n for newline — engineers may or may not want to have these
characters displayed), live search with highlighting (for searching back through
connection responses). Paging worked very much in the same way as standard
pagination works on a blog, engineers could PAGE UP and PAGE DOWN through data
as and when they pleased.
Humour me for a moment, but head over to your terminal/command line application
and run ls -lRt and hit enter. The volume and frequency of that data pouring
down your screen gives you a rough idea of the rate and volume of data that was
being sent from the backend to the client-side application. This data all needed
be parsed, stored, paged, formatted and displayed in the browser at
best-to-real-time as possible.
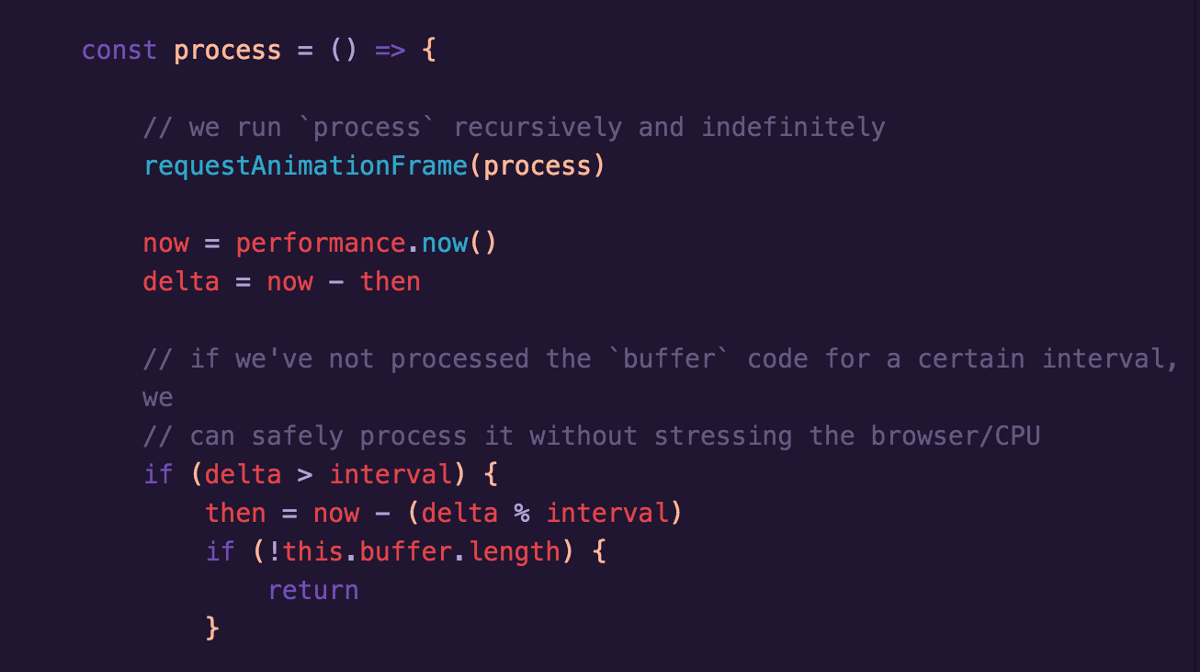
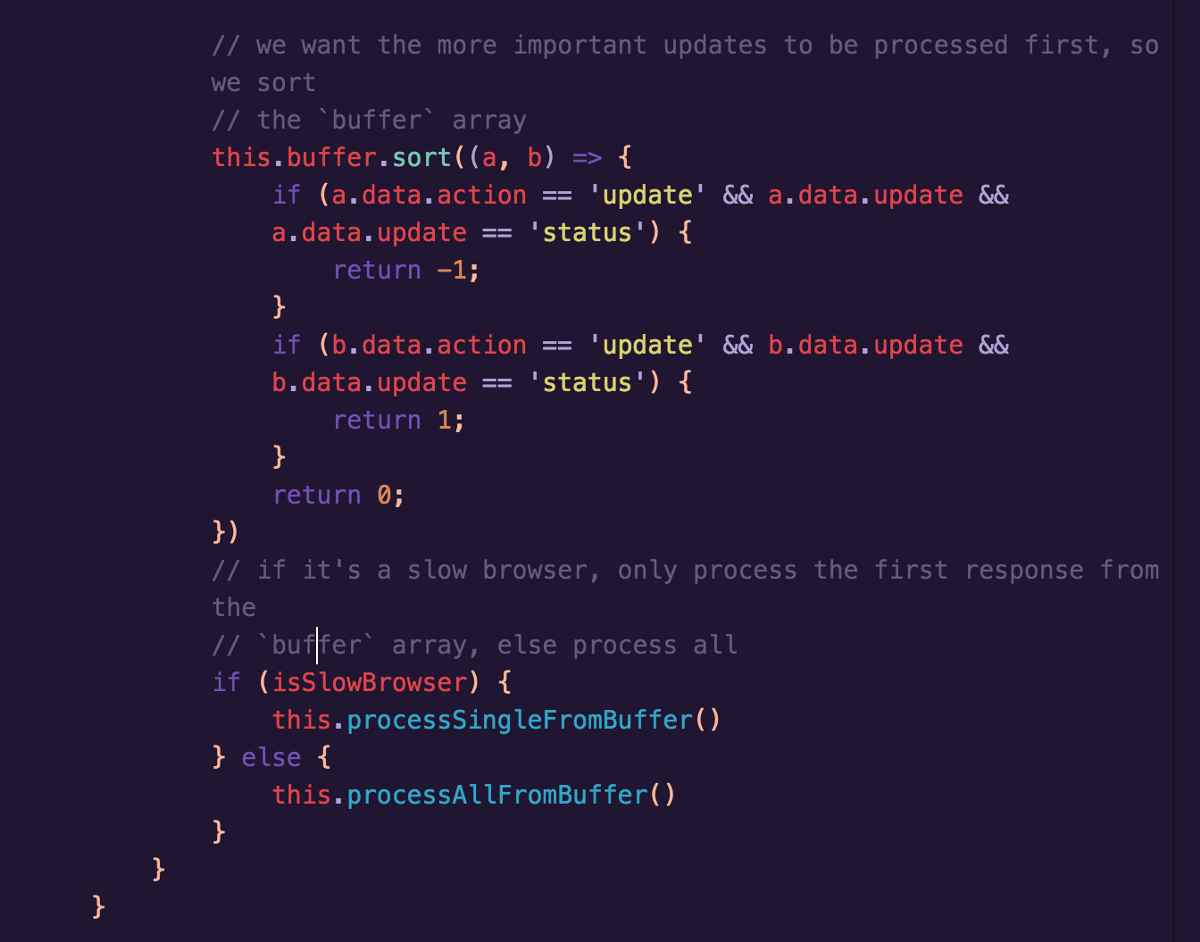
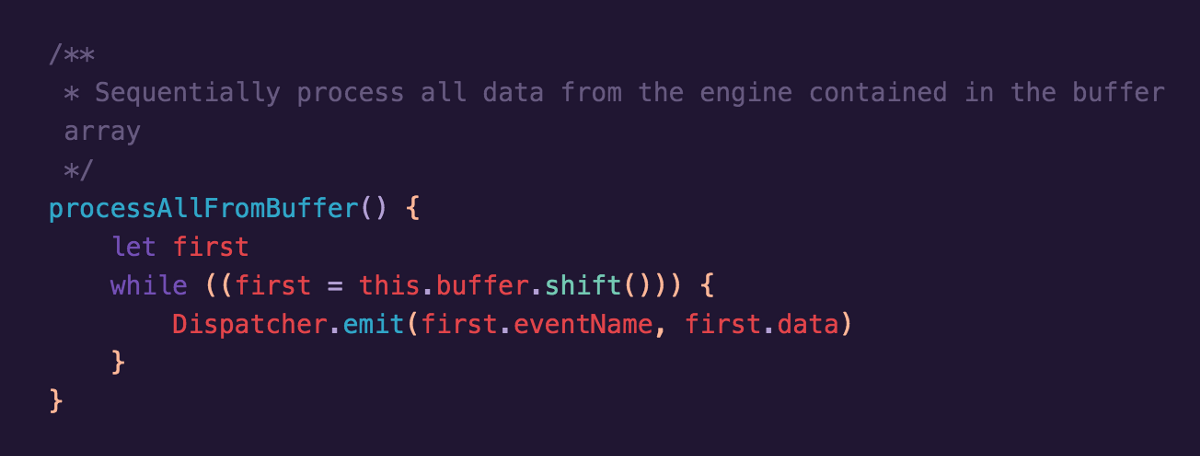
My tactic was to identify the maximum performance of the browser and platform
the application was running on, and adjust the rate at which the WebSocket class
sent new data to the Backbone Collections and Models, thus throttling the rate
at which the React Component needed to touch the DOM. I created a buffer array
in the WebSocket class which I pushed new data into, and then separately ran a
requestAnimationFrame method to process the updates from the backend. I could
then manually control the rate at which these updates are processed. Chrome on a
Mac could handle a re-render once every ~100ms, whereas Firefox on a low-powered
VM (unfortunately, this is the environment it was to be deployed to) would only
handle refreshes once every ~500ms. This performance tuning was only in effect
on these two intensive screens, the rest of the application processed updates as
soon as they were received.
React Native
Near the end of the project, I was tasked with porting a certain screen (the
screen which allowed multiple tests to be ran at once) to a native application,
specifically, an iOS application. Even though I built Plot
in Objective-C, it made more business sense for the native application to be
built using React Native, which meant the JavaScript knowledge could be
transferred within the team taking over this project, opposed to having to hire
a specific iOS developer. The syntax of React Native is pleasantly easy to pick
up if you already know React, but the real issues getting going came from the
installing/running/configuring of the React Native project. Once these settled
down after much Googling/StackOverflow-ing/GitHub Issue-ing, I picked up some
momentum and managed to re-create the whole screen (I’d say ~95%) of the
functionality in 10% of the time it took me the first time round to create the
screen using React in the web application. My tactic was to have the React
Component in one pane on the right, and the new React Native Component in the
left pane, and I’d go line by line and translate the majority of the render
method into React Native syntax. Not so tricky.
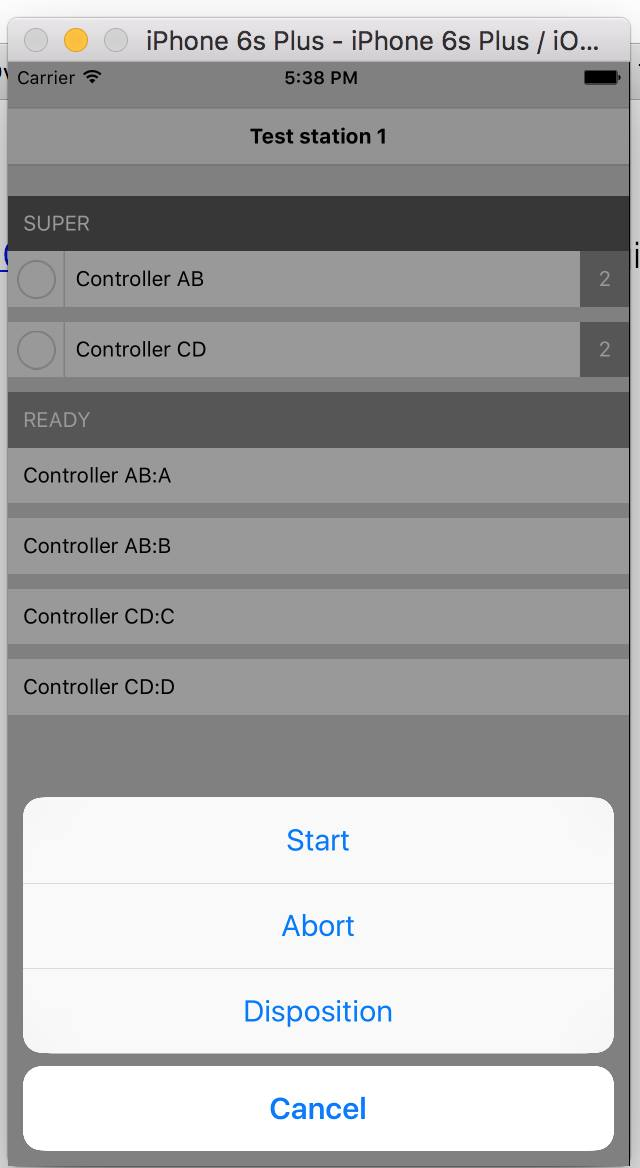
The same functionality, running as an iOS app, using native controls
Next was to wire up the user interaction event callbacks to the existing Backbone Collections and Models and try and keep everything above (ie. above in the architecture — namely the data layer) the React Components as untouched as possible, ie. everything was already set up in the Collections and Models to be sent/received from the backend, I just needed to send along the right data in the right format, and all was good. I extracted a lot of logic from the React web app Components into agnostic helper classes, which didn’t touch the DOM, use React or Backbone, but were purely for business logic, ie. formatting, filtering, etc…I then adapted both the React web app Components and the React Native Components to share these modules and therefore create common shared logic between the two parts of the codebase. I placed all the React Native code in a directory within the existing web application codebase, and sym-linked the Backbone Collections/Models and shared logic into this React Native directory, this allowed me to import modules in the React Native Components without re-structuring the web application codebase too much (in React Native, you can’t require modules above the root of the project directory — go figure).
Hindsight
I’m fairly happy with the choices I made for this application, in terms of libraries and architecture, but if I could start the project fresh today, I’d almost certainly use Redux in place of Backbone, and do away with using an Event Emitter. In removing Backbone, I’d also have to find a routing solution — which I’d go for React Router.
Unfortunately for me, as you saw from the email, I chose Backbone on the 6th May 2015, and Redux got it’s first commit on the 29th May 2015. Timing.
Next
I worked on this application for 15 months, from it’s inception as a set of static HTML/CSS files, to it being a fully-fledged robust real-time application that’s currently being put through intensive QA/load-testing and approaching general availability in the software release cycle. Unfortunately for me, the rollout/deployment for this product will be integrated into the aforementioned manufacturing factories over the next few years, way beyond my time on the project!
If anyone wants to know more details about what you’ve read above, I’d be more than happy to delve deeper on specifics. Just holla.
I’m going to be available for projects from September, so if the any aspects of the above would be of use and you’d like to hire me, get in touch via email (on my site) or Twitter.
👋 Cisco, it’s been emotional

Cisco, in San Jose, California, where I spent a total of 11 weeks over 4 separate trips working with their in-house team. The rest of the time on the project was spent developing remotely from the UK.
